Microsoft Outlook
Make every message count—make it accessible with Outlook.
At the University of North Dakota (UND), all students, faculty, and staff are provided with a university email account through Microsoft Outlook, part of the Microsoft 365 suite. This service is provided by the North Dakota University System (NDUS).
To get started, visit University IT’s (UIT) Email Access page.
Accessible Email Communication
Email is a key communication tool at UND, so it’s important to ensure your messages are clear and understood by everyone—including those using assistive technologies like screen readers. To create accessible emails, use clear writing, proper formatting, and thoughtful use of images and attachments to remove barriers to understanding. Whether it’s a quick note or a campus-wide announcement, following accessibility best practices makes your email easier to read, inclusive, and compatible with a variety of technologies.
Additionally, accessible communication benefits a broad range of individuals—not just people with disabilities. Non-native English speakers, busy readers, mobile users, and even you will benefit from clear and accessible email messages.
Craft an Accessible Email
Ensure that you have included a clear and concise subject line. Emails compete for our attention every day. Subject Lines alert the reader to the content of an email by providing a preview of the email content, helping recipients determine relevance and urgency. To maximize effectiveness, subject lines should be clear, concise, and compelling.
Headings are signposts that structure text and allow readers to more easily navigate their way around an email. More than bolded or italicized words, headings provide extra information about the structure of the document at the code level.
Using Styles to Apply Headings
Creating headings in Outlook involves more than simply bolding or emphasizing text. Instead, headings are managed by what Outlook calls styles, built-in formatting characteristics that can easily be applied to text. Styles can be applied by highlighting your text and navigating to the Messages tab.

Note: Styles in Outlook cannot be modified. In Microsoft Word and PowerPoint, the user can modify headings by changing the font, color, and size. However, Outlook offers a less advanced Styles pane.
Avoid manually creating lists using numbers, symbols, and tabbing. Apply preset list styles for both bulleted and numbered lists. These can be applied by navigating to the Messages tab and/or the Format Text tab.
Message tab

Format Text tab

Note: Preset list styles cannot be modified in Outlook.
When crafting your email, choose appropriate fonts and font sizes. Avoid decorative fonts like script fonts, serif fonts, Wingdings, etc.; they are not easy for all users to read. Opt for easy-to-read fonts like Arial, Calibri, Helvetica, and Futura instead. Additionally, ensure that all body text is at least 12 pt. to ensure readability.
Edit Text
There are three locations in which you can edit font choice and size.
- The Message tab
- The Format Text tab
- The Mini Toolbar
The Message and Format Text tabs appear above the Outlook ribbon when composing an email. The Mini Toolbar can be accessed by right-clicking on the highlighted/selected text you wish to edit.
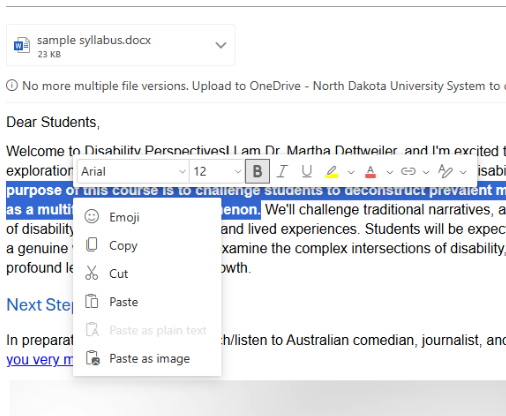
Ensure that text, diagrams, charts, and other meaningful content meet a contrast ratio of at least 4.5:1 for regular text. For large text (18+ pt. or 14+ pt. bold), a minimum contrast ratio of 3:1 is acceptable. Use online contrast checkers like WebAIM to ensure compliance with accessibility standards.
Steps for Editing Text and Background Color
- Highlight the desired text.
- Select the Font Color tool and/or the Text Highlighter tool.
- Choose from the pre-set colors OR input a 6-digit HEX color code.
- For greater accessibility, choose from colors displayed under the High Contrast Only colors.
Accessibility Tip: Avoid using color alone to convey emphasis. Screen reader users may not be aware when text is colored, and color-blind users might struggle to differentiate between colors. Use other methods of emphasis, such as bold or italics, in addition to color.
Avoid using images as the primary email content, as this creates significant accessibility barriers.
- Screen readers read images as "image" since they cannot extract text from image files.
- People with visual impairments may struggle with poor color contrast or small font sizes.
- Image-based text cannot be modified using assistive technology.
- Images may be blocked, distorted, or flagged as spam by certain email clients.
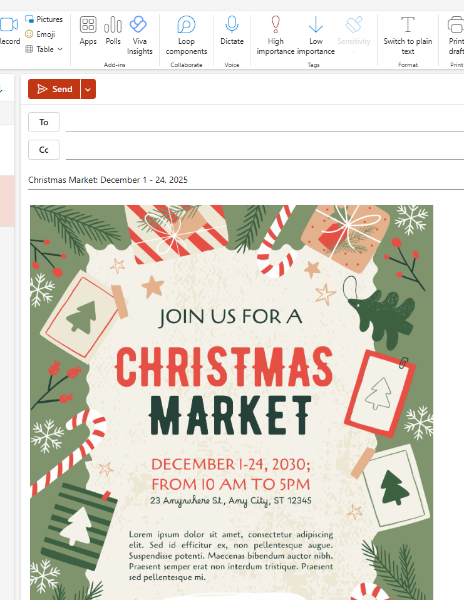
Accessibility Tip: When including an event poster in your email, be sure to repeat any text from the image either in the email body or in the image’s alt text. Key details like the event’s date, time, and location should always be included in the email body to ensure everyone can access the information.
When adding Images, always include alt-text. This ensures that users relying on screen readers can understand the content of visual elements, even if they can't see them.
Set Alternative Text
To set alternative text for an image in Outlook,
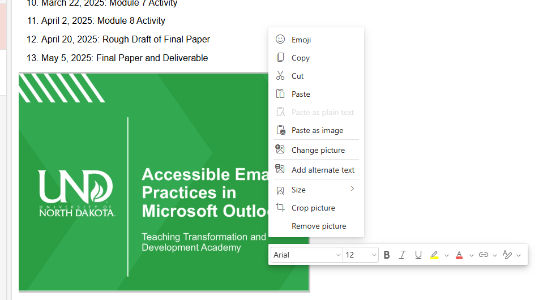
- Right-click on the image.
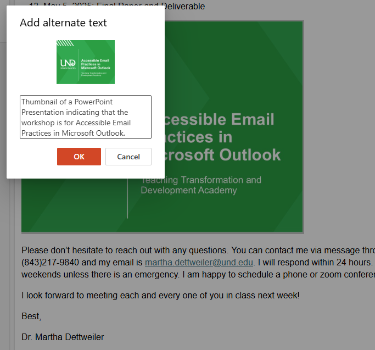
- Select Add Alternate Text from the drop-down menu.
- Type your Alternate Text in the Add Alternate Text pane.
- Select OK to save your text.
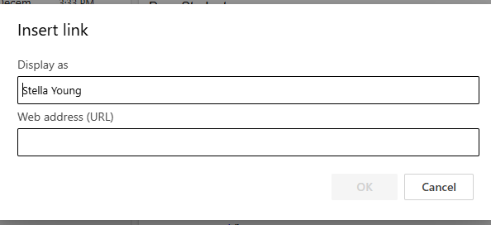
Write link text that clearly describes the link's purpose (e.g., "Download the accessibility checklist" rather than "Click here"). This ensures all users can easily understand the destination of the link.
Insert Descriptive Links
- Type or select the text you wish to display as a link.
- Navigate to the Insert tab.
- Select Link. An Insert Link pane should appear.
- Verify that the link text you want displayed is correct.
- Paste the link URL in the web address box.

Use attachments sparingly. When possible, avoid attachments in favor of embedded content or external links. If attachments are necessary, ensure the following:
- Attachments have descriptive file names.
- Attachments are accessible in their original source file (run the Accessibility Checker).
Insert an Attachment
To insert an attachment, navigate to the Insert tab. Select where you are pulling this file from.

Run the Accessibility Checker to test for accessibility issues. This checker scans your document for potential issues that might prevent people with disabilities from accessing the content properly. It will highlight the issues, provide suggestions on how to fix them, and then prompt you to fix these issues.
Launch the Accessibility Checker
- Navigate to the Options tab.
- Select Check Accessibility.
- The Accessibility Assistant pane will open on the right.

Accessibility Tip: For optimal accessibility, launch your Accessibility Checker and Editor pane prior to composing your email. This will alert you to grammar and accessibility issues while you work.
Resources
Consult the Accessibility Resource Index to find help articles on common accessibility issues in Microsoft Outlook.
Deque University
As part of its effort to meet the Title II ADA Digital Accessibility requirements, UND has partnered with Deque University to provide an expansive selection of on-demand digital accessibility training modules to all UND employees. Explore accessibility in Microsoft Outlook by taking the self-paced training, Email Accessibility in Outlook.
Email Accessibility in OutlookRecorded Workshop
Discover how to make your communications more accessible with Microsoft Outlook’s built-in accessibility features. Learn practical tips to improve accessibility in everyday email communication, benefiting both senders and recipients at the University of North Dakota.